
DIY Pantry Door Organizer
Remember how I told you I wasn’t quiiiiite done organizing my pantry yet?
Well, today I’m sharing the second half of the project – a really easy DIY pantry door organizer that has managed to free up an entire drawer in my kitchen.
I mean, what am I even going to do with all the extra space? It’s like magic!
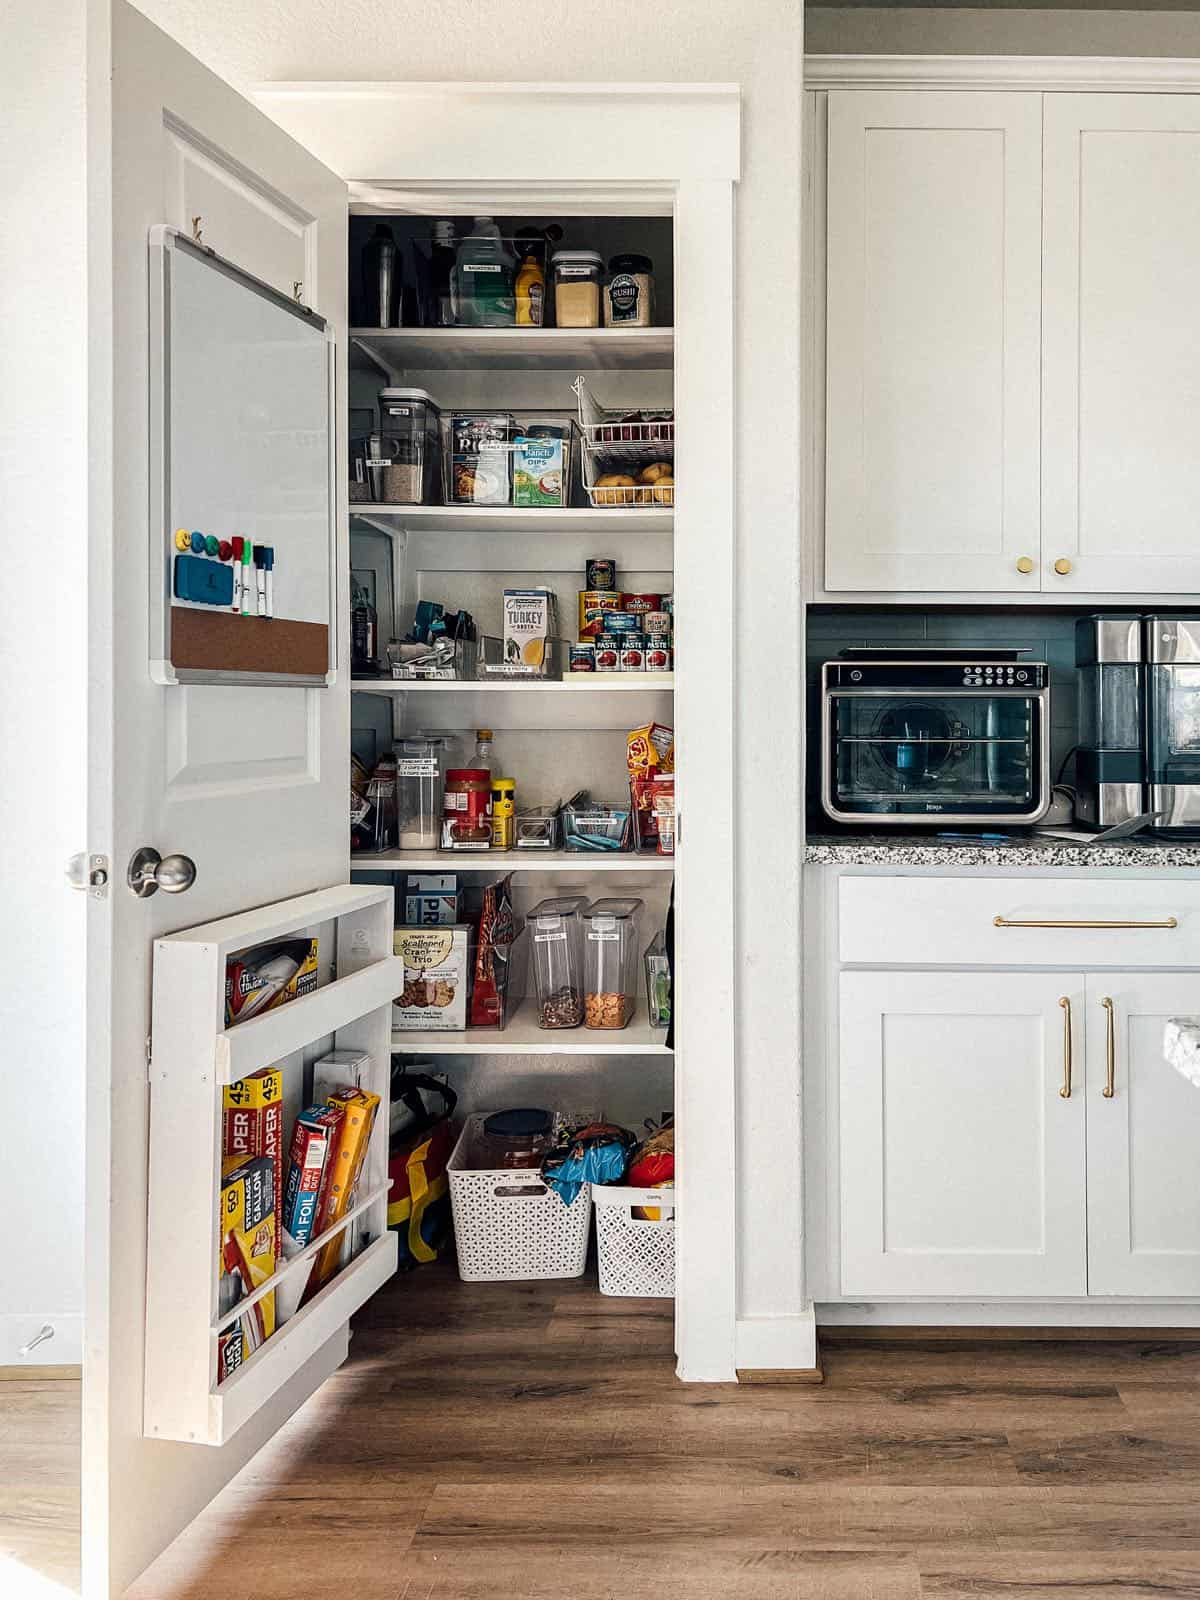
Our pantry is small, and while it’s feeling a lot more manageable thanks to the pantry organization project I shared earlier this week, it still needed a little something extra. I’m big on maximizing every square inch of space that I can, so I didn’t want to let the back of the door go to waste!
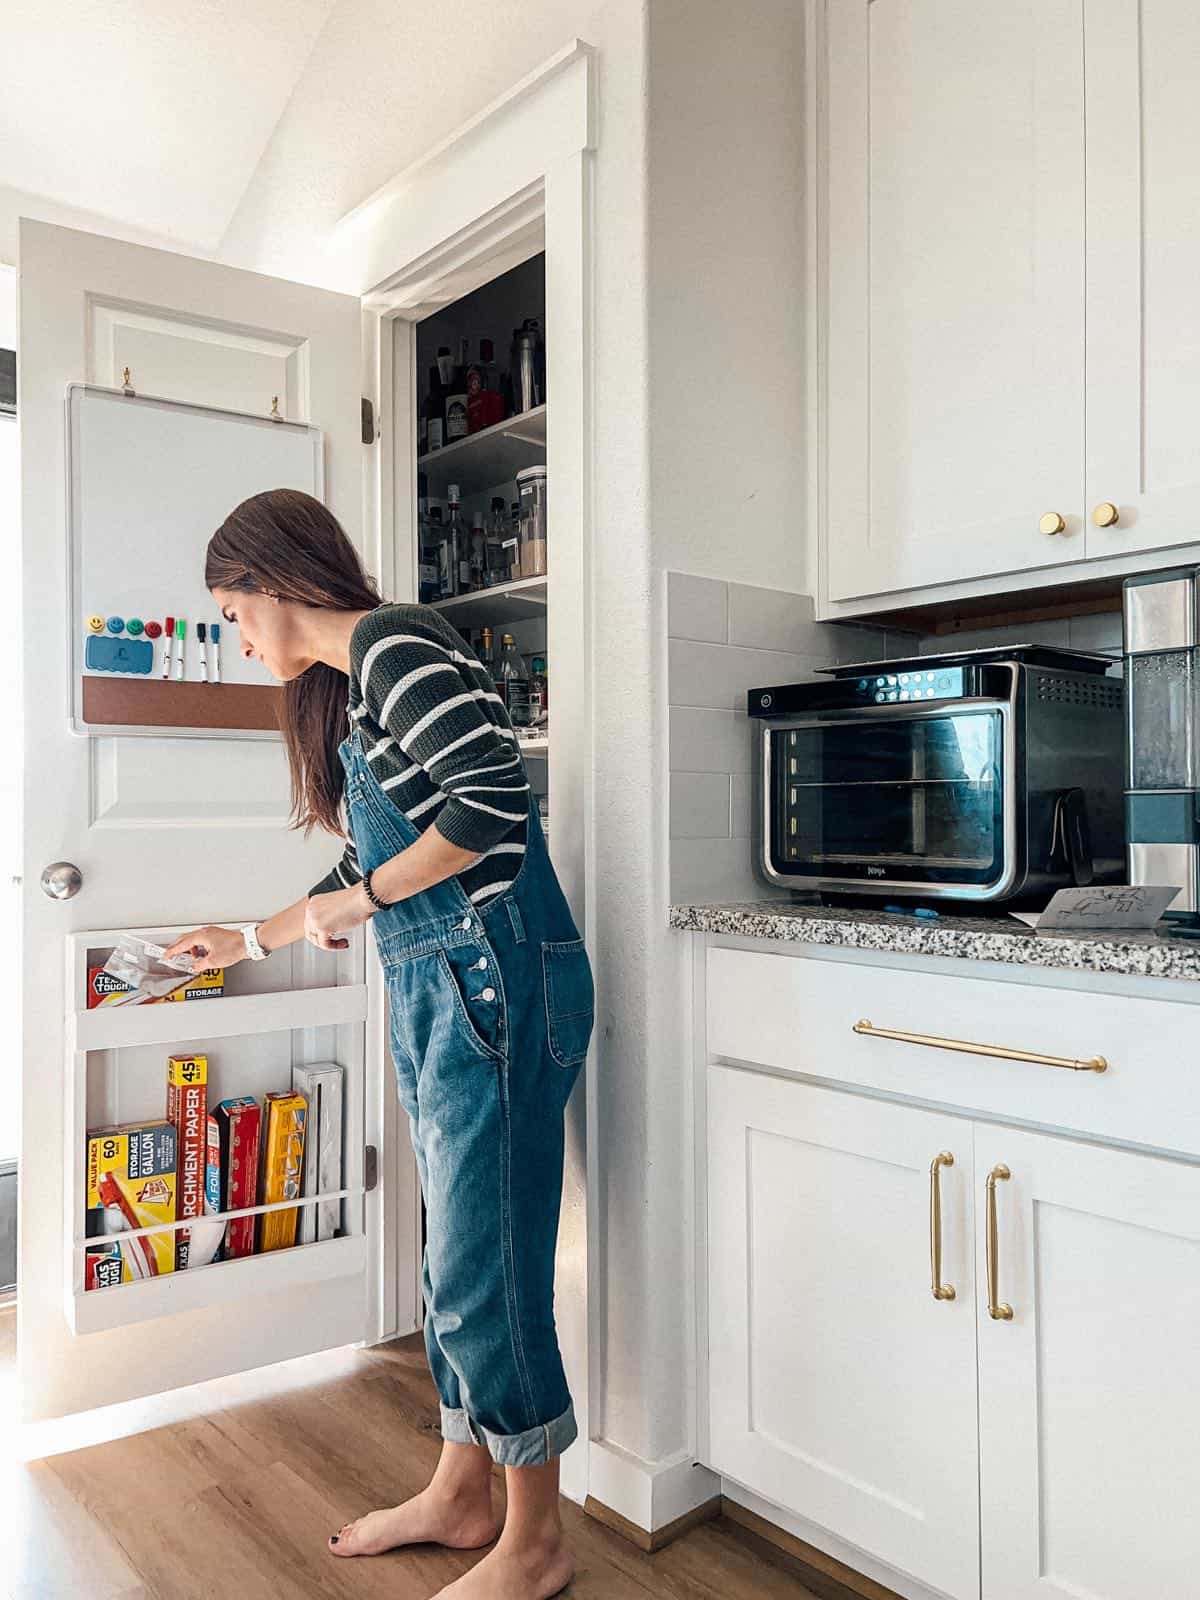
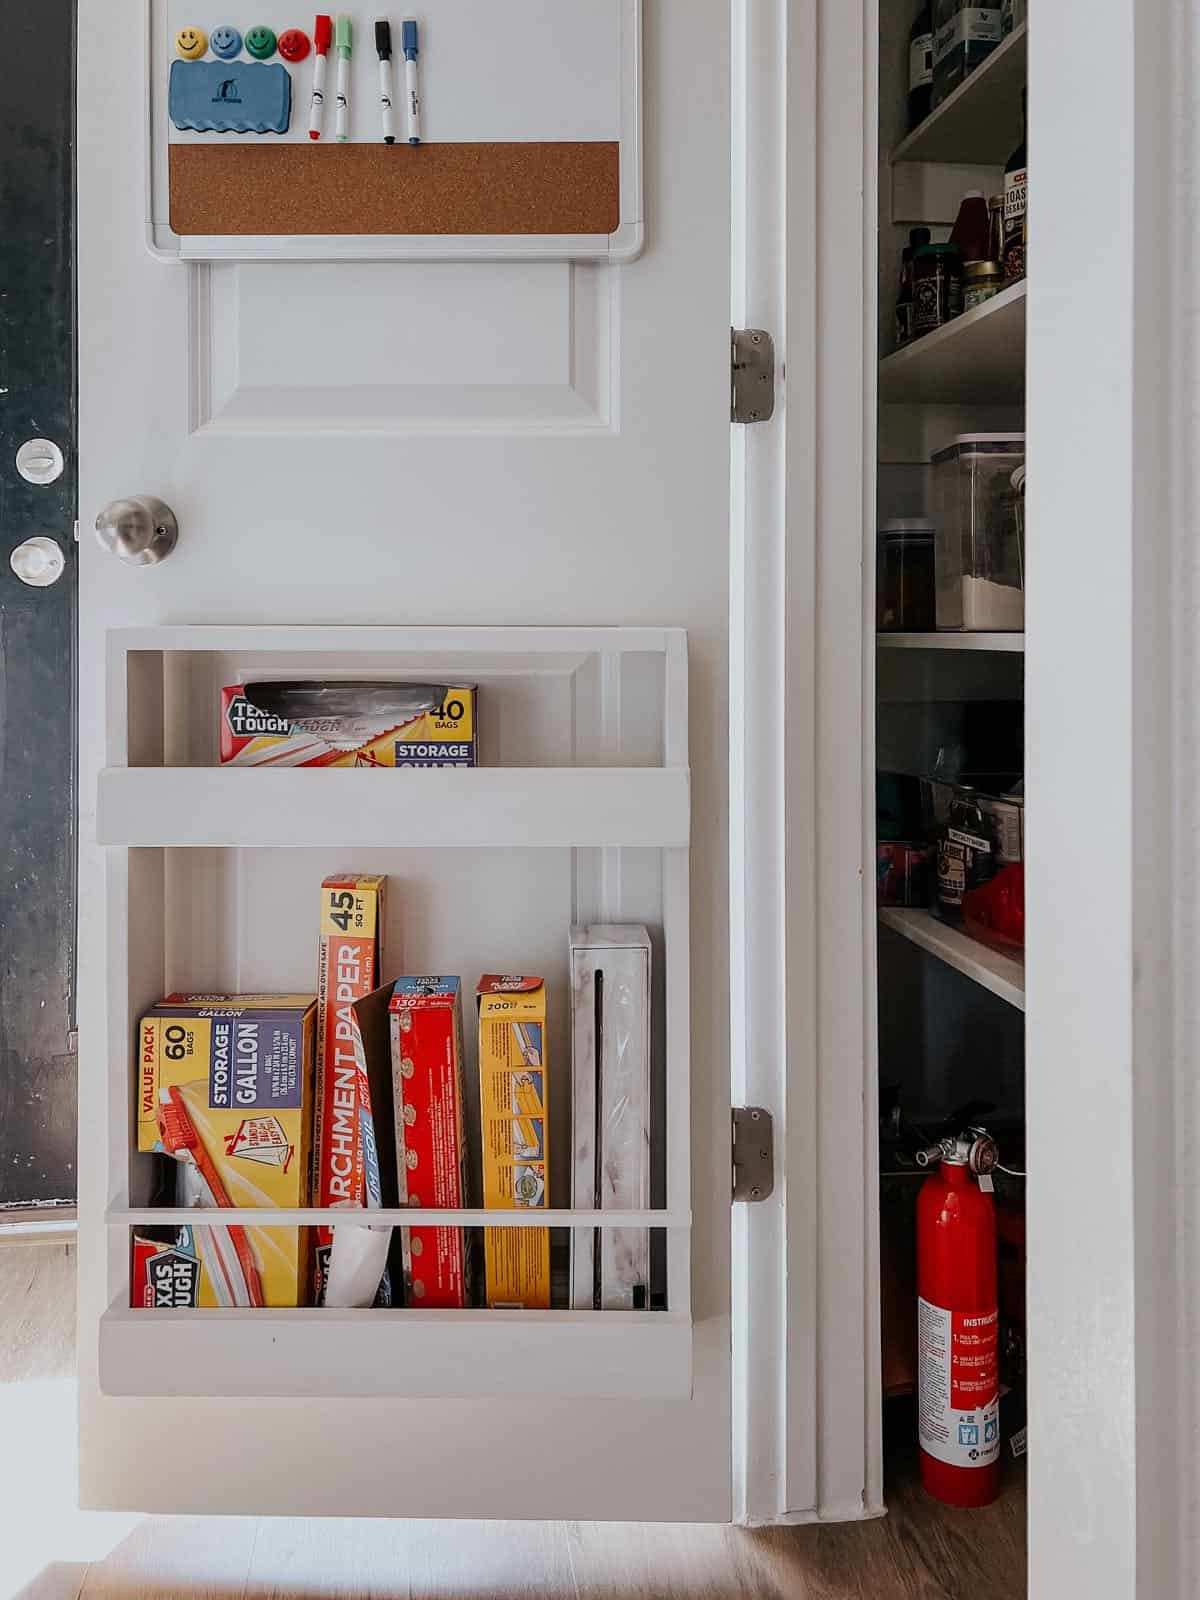
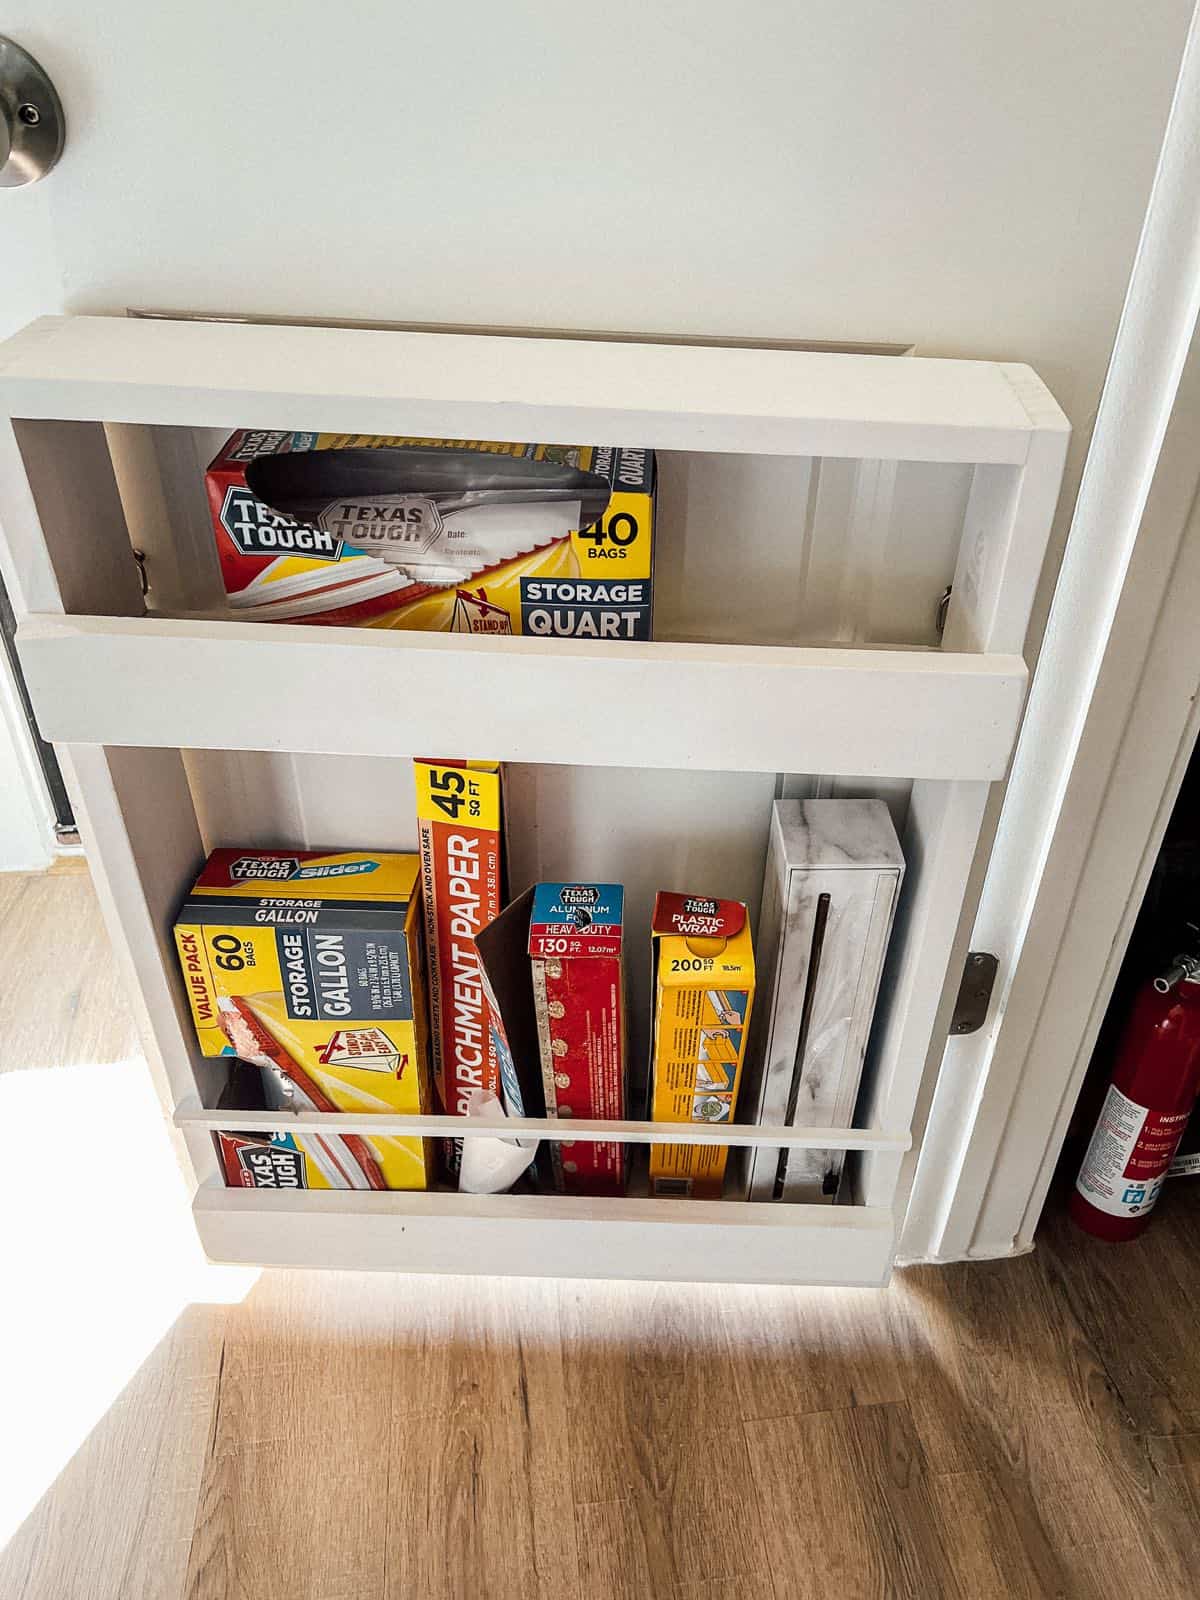
I built a super simple DIY pantry door organizer with just a few pieces of wood and a little bit of paint. It took me one afternoon from start to finish to put it together. It holds all of our ziplock bags, foil, plastic wrap, and that sort of thing – and oh man, am I ever in love!
How to build a pantry door organizer
The back of a pantry door is the absolute perfect space to add a little bit of extra storage to your kitchen. I chose to use mine to store our various wrap dispensers and food storage bags. But, you could use yours for spices, bottles, cans, or just about anything else!
This is a project where you can easily slightly adjust the dimensions to fit your needs and use it to store almost anything in your pantry! My only caveat is that I wouldn’t put anything too terribly heavy in your door organizer if you have a hollow-core door (which, most of us do). The last thing you need is for your organizer to come crashing off the door!
I used hollow core door anchors that say they can hold up to 40 pounds, but I still erred on the side of caution and am only going to be storing really lightweight things in my organizer.
Just to be safe.
materials needed:
My pantry door organizer measures about 25″ tall by 19.5″ wide. You may need to make adjustments depending on your needs.
- 1×4 pine wood (A 10′ board would be perfect)
- 1×3 pine (I used scrap for this)
- 1″ square dowel
- Drill + screws
- Wood glue
- Pin nailer
- Paint
- Hollow core door anchors
- D-Ring hangers
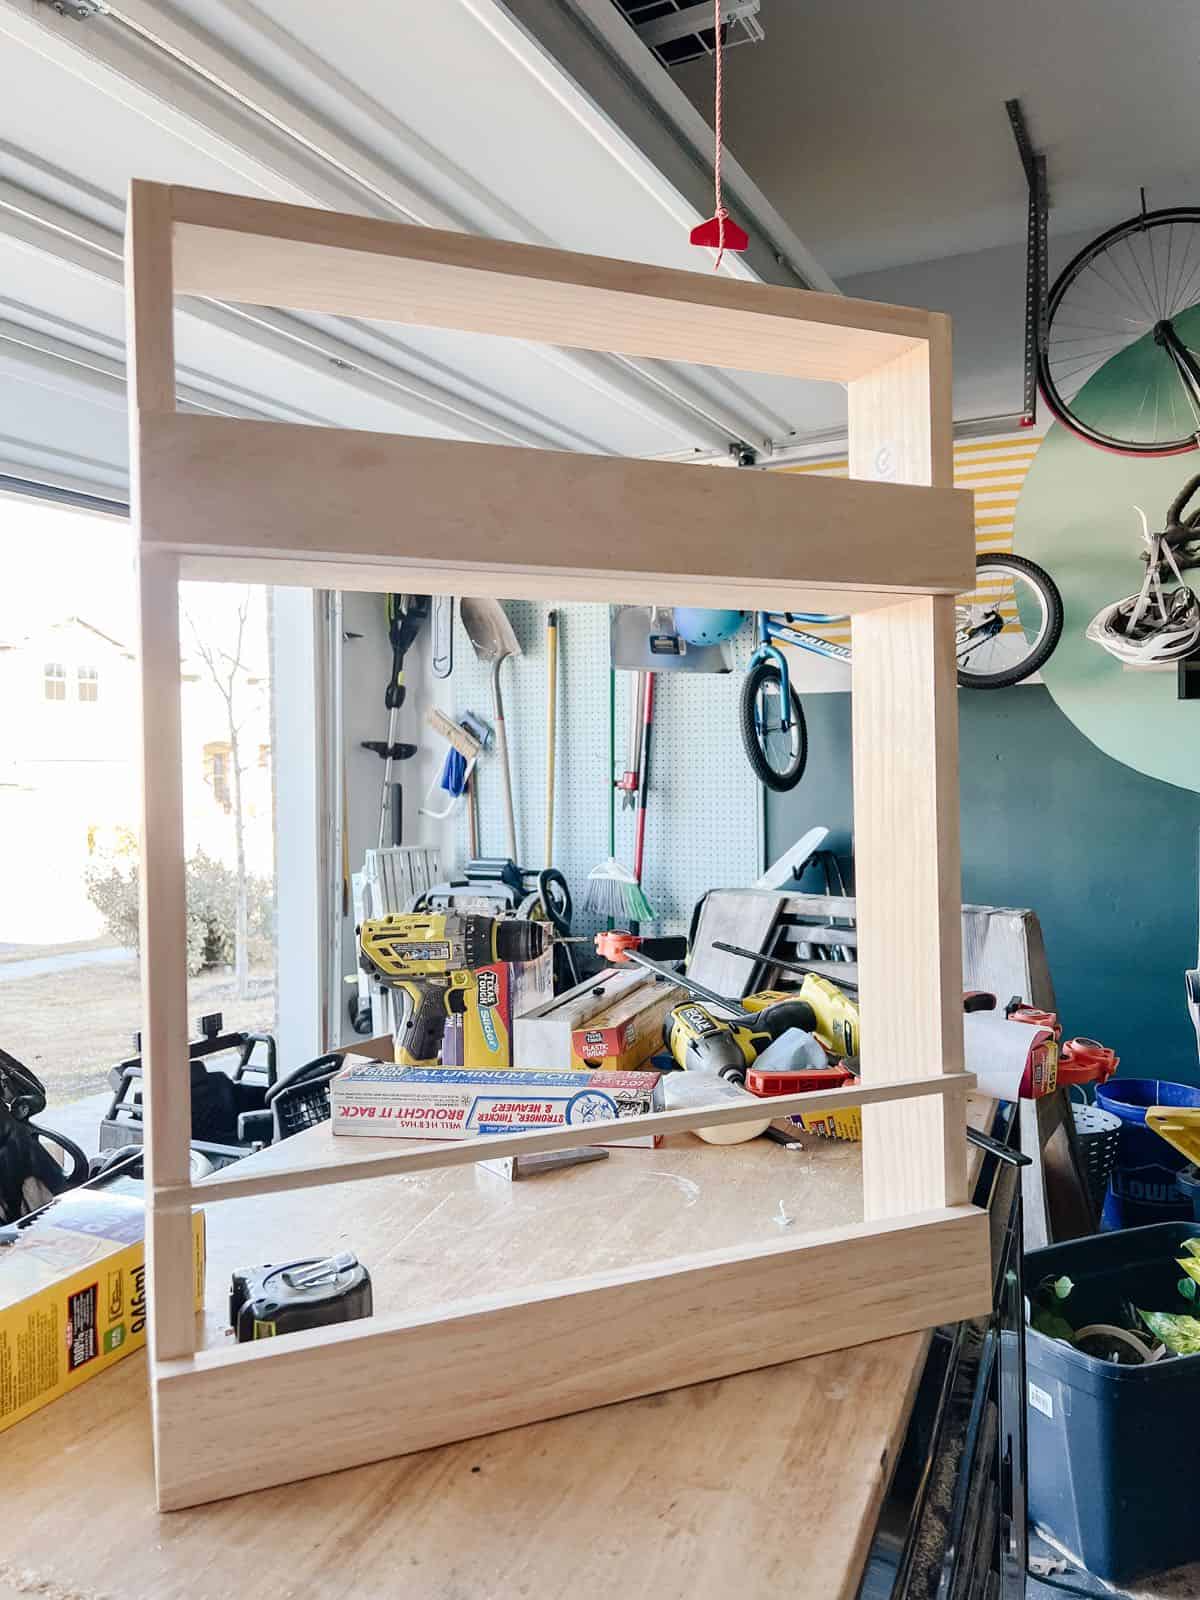
Step 1: Cut Wood + Assemble Frame
First, you’ll need to make a rectangular frame for your organizer. I kept things really simple and just used a drill and screws to assemble my frame. Don’t forget wood glue for some extra longevity!
I recommend pre-drilling the holes in your wood to prevent the pine from splitting. When you’re drilling close to the edge of a piece of wood, it can often split if you don’t take the time to pre-drill. This includes pre-drilling into the side of the second piece of wood!
To do this, I recommend clamping the pieces together as they’ll be assembled, then pre-drilling a hole all the way through the first piece of wood and into the second. It’s a quick extra step that makes a huge difference.
Repeat the process until you have a rectangle. Use a speed square as you work to make sure that things stay square and nothing gets wonky!
Step 2: add shelf
Now, you’re ready to add the shelf. I added mine about 6″ down from the top of the organizer. This was the perfect spacing for me to tuck in a box of ziplock bags. Again, if you’re planning on putting other things up there, you may need to adjust the spacing.
I ran out of scrap wood for my shelf, so I actually just cut down a piece of 3/4″ plywood to create my shelf. Just a reminder that you can get creative here and use what you have laying around!
I attached the shelf the same way I built the frame. I just cut it to fit inside the frame, slid it into place, and then added screws to hold it still.
step 3: add trim
Now, it’s time to make it look a little more polished and help hold all of your stuff in place!
I added a piece of 1×3 wood in front of each shelf. This helps hold everything in and makes. sure that nothing goes flying when you open the pantry door.
On the bottom section, I also added a small square dowel about 3″ up from the 1×3. Since I was putting the long and skinny boxes for foil and other things, I didn’t want them to fall forward if the pantry door got slammed. Be sure to take the time to play around with spacing here. If you do it too high you won’t be able to pull your boxes out! For me, this was the perfect height to pull things out without hitting the top shelf.
step 4: Paint + hang the pantry door organizer
Annnnd now you’re ready to finish it up!
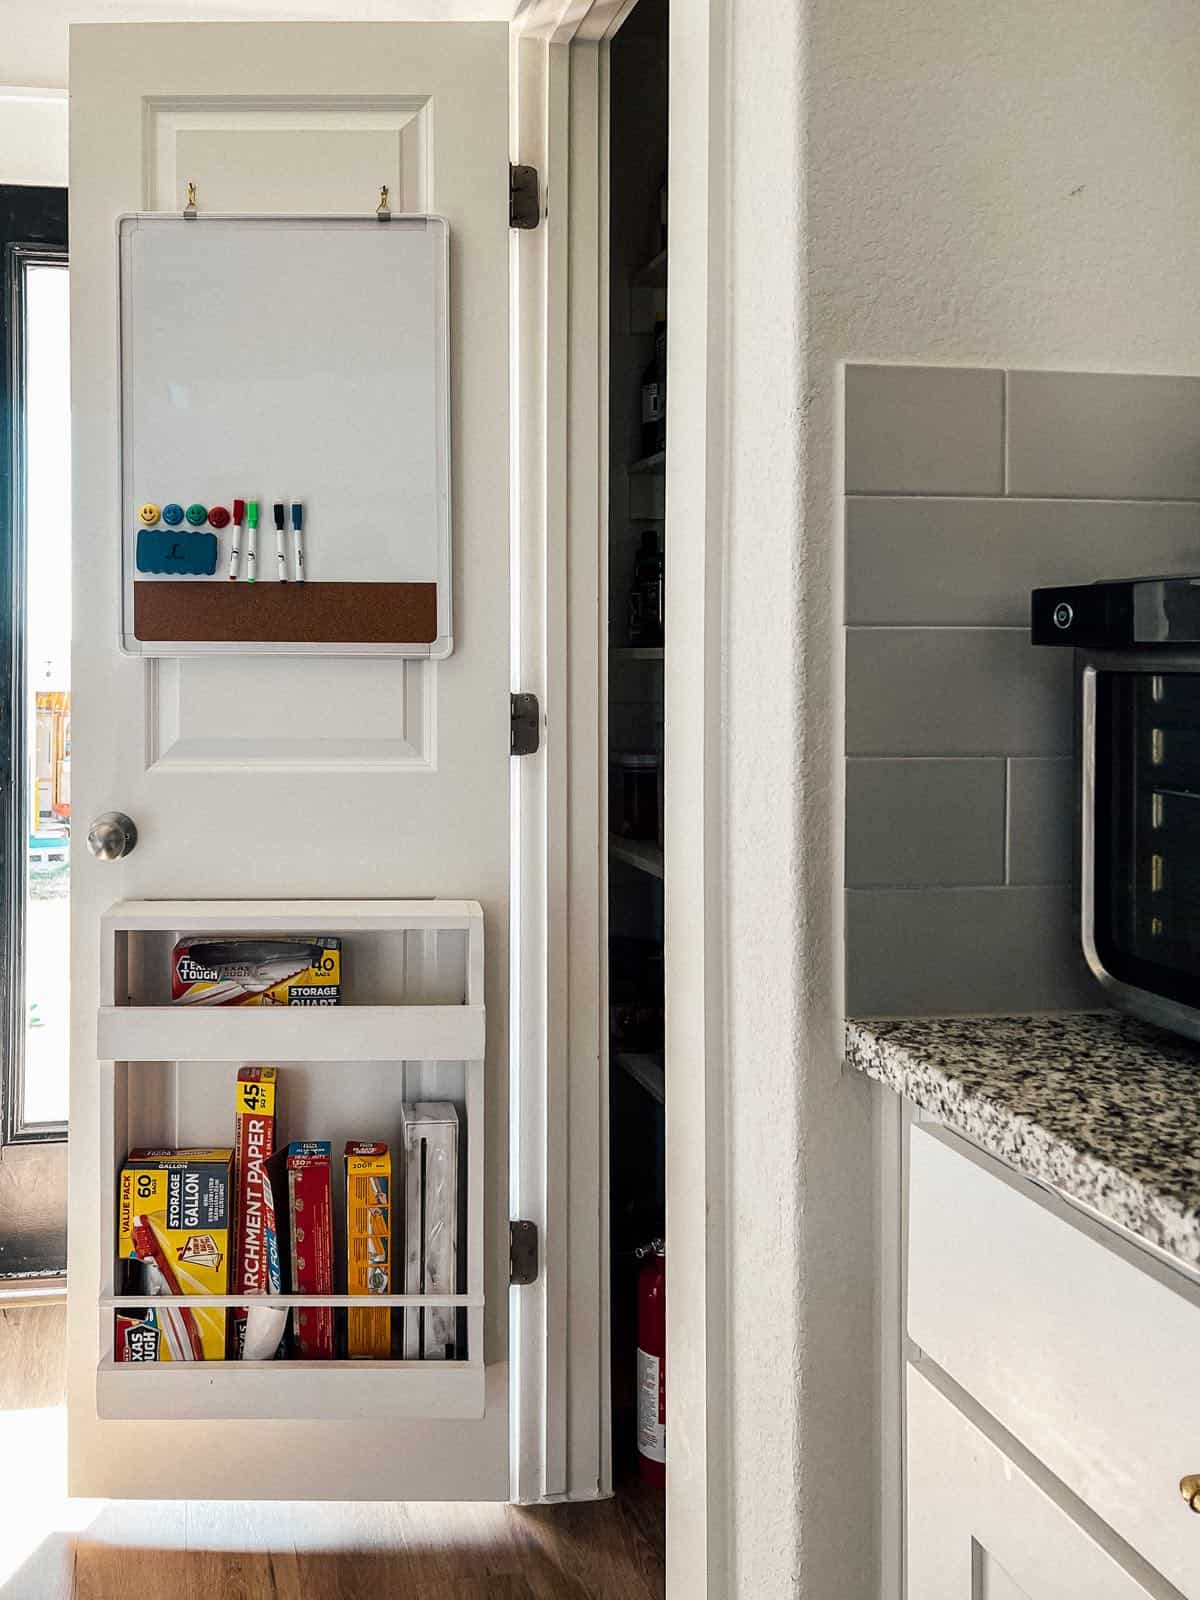
I painted mine white to match the door. As I was in the middle of painting it I kind of wished I would have left it wood and stained it dark. It would have been a nice contrast.
But, once I hung it up, I appreciated that it just blends right in with the door and kind of feels like it’s always been here!
I used some white spray paint I had laying around to paint the whole thing, then I hung it.
I debated the best way to hang it and I ended up landing on adding these picture hangers to the back and hanging them from some of these.
Why this method instead of attaching it directly to the door? A few reasons:
- I wanted to use the hollow core door anchors, and I knew it would be much more complicated to use them with pocket holes (getting the placement right would be a nightmare).
- I wanted to be able to easily remove it if I need to make adjustments as our needs change. If I used pocket holes to attach it directly to the door, I couldn’t just pull it on and off whenever I wanted. Why? Because as you insert and remove screws repeatedly, the hole can become bigger until it’s no longer usable.
- This is just what made sense to me! And sometimes, you just gotta go with what works best for your brain.
Using hangers was really quick and simple. I attached some D-ring picture hangers about six inches down on either side. Then, I hung the hooks in a corresponding spot on the door.
I added a bit of this mounting tape along the bottom of the door organizer before I hung it, to help make sure that the organizer doesn’t flop around when the door opens and closes. So far, it’s staying in place really nicely and works well. You know I’ll let you know if that changes!
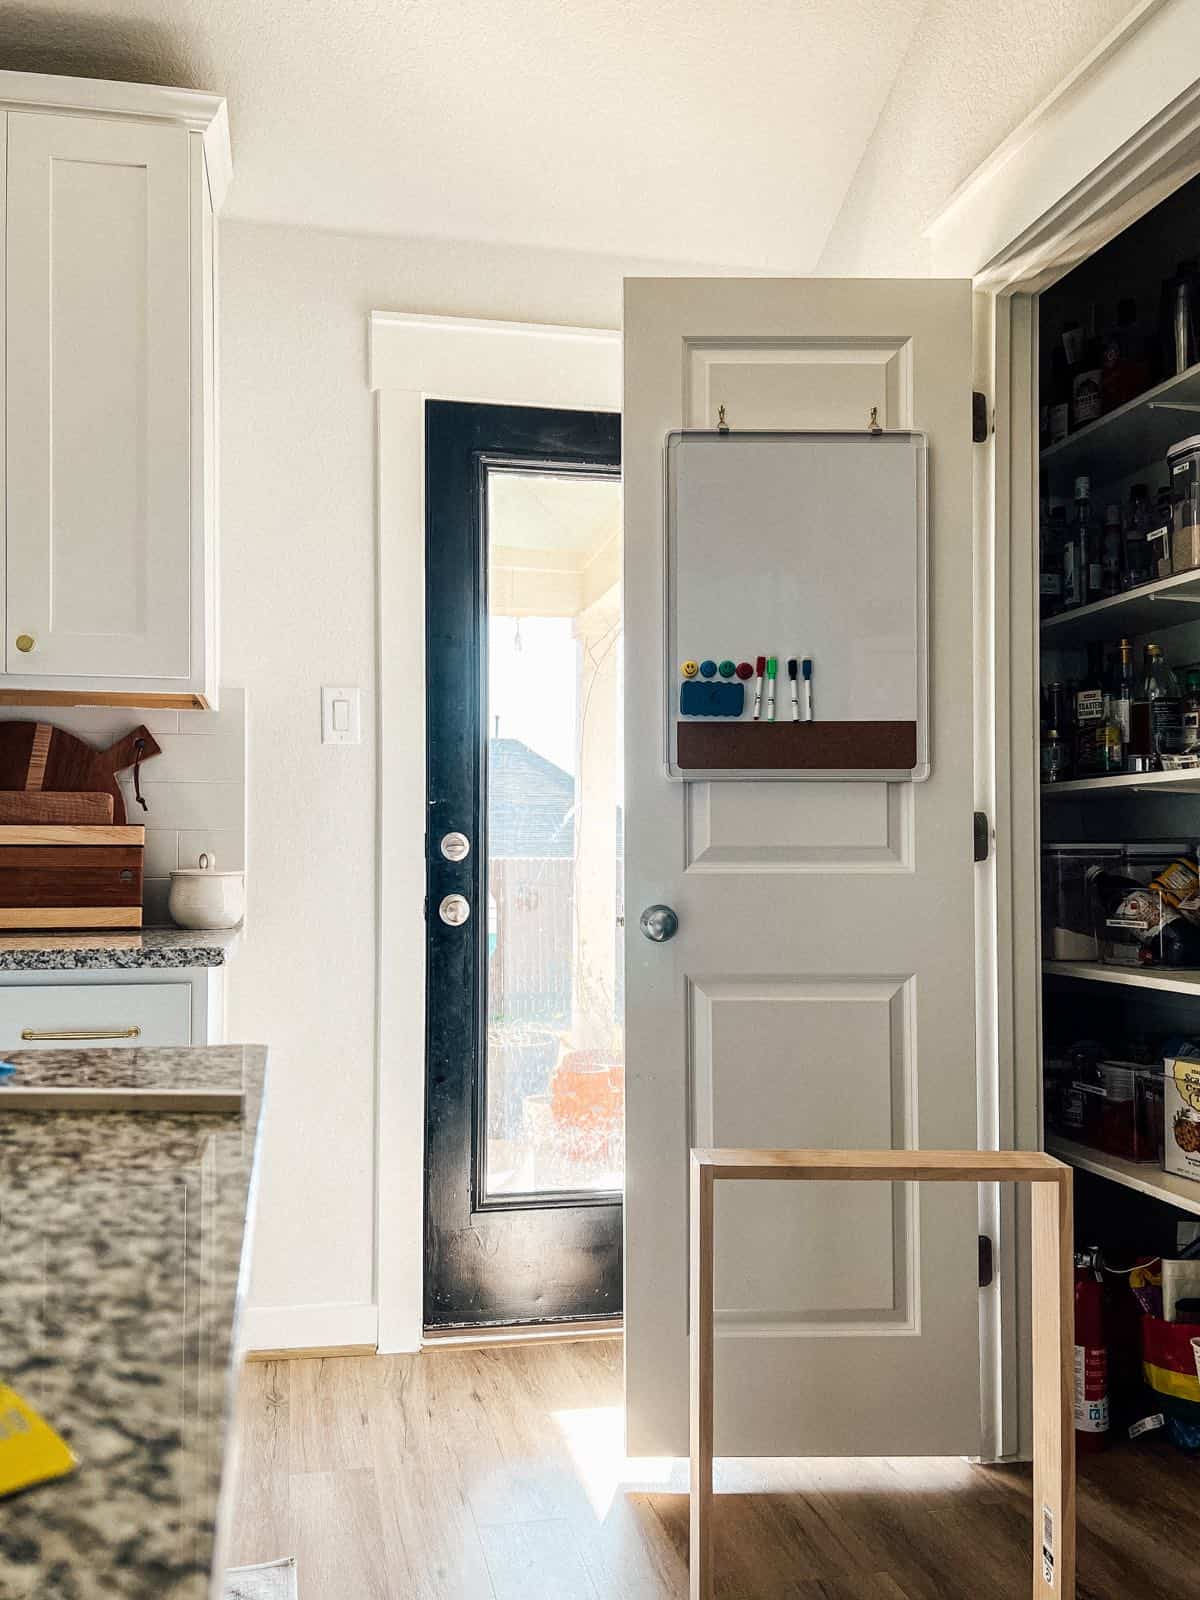
Adding a whiteboard to the pantry door
While I was at it, I also took the time to add a little whiteboard to the top half of the door. Corey has wanted something like this for a while to jot down reminders, appointments, or notes on things we’re out of. I love that it’s magnetic so we can keep the markers and erasers with it. The cork board along the bottom is also so handy. It’s the perfect place to stick reminders from school or mail I need to deal with.
I’m so glad I took the time to turn this blank door into a super functional space. And, it’s definitely got me pondering what other doors in our house we could add some organization to!
This was a one-day project for me, and I’m always a huge fan of any project I can quickly knock out to add some more function to my house.
Things in my kitchen are starting to feel really organized, but I still have a long way to go. We’ve got a food storage container cabinet that’s an actual nightmare, our cookie sheet cabinet attacks you every time you open the door, and the area under the sink is a mess.
We have plenty of projects left in here, but I’m feeling really good about how far we’ve come!
Other kitchen organizing projects
- Organizing our junk drawer
- DIY pull-out pot and pan organizer
- Silverware drawer organizer
- Small pantry organization tips
- Spice drawer organizer
The post DIY Pantry Door Organizer appeared first on Love & Renovations.